1. Welcome
Welcome to the Gnarus User's Guide
Gnarus aims to make understanding your operation as easy as possible.
We provide a website for you to use on your laptop for more control and a mobile app to use on the go.
If you are training a new staff member or would like to find out everything Gnarus provides, you are in the right place.
As an overview, Gnarus provides the following:
- Once your admin has given you access, log in to the website or mobile app with your mobile number
- View realtime charts of the Dry and Wet Bulb temperature in your tunnel
- View and download all of your data in excel
- Scan barcodes or enter trolley numbers to track data for your tobacco
- Copy data between barcodes for a full tobacco lifecycle
For device admins, Gnarus allows you to:
- Configure SMS and Voice alerts based on current sensor values
- Allow others to log in to your device, and decide what they are able to do
To learn more about each section, click through the table of contents on the left, or keep scrolling to see all sections.
2. Logging In
Make sure your device administrator has already given you access to Gnarus before logging in with your mobile number, or you will receive an error.
If you are not sure who your device administrator is, drop us a line on sales@gnarus.io, we promise our phone will beep and we will get back to you asap!
First, browse to https://gnarus.io on your phone or laptop.
Then enter your mobile number (it can start with either 07 or 7, we have filled in the +263 for you). Then click VERIFY

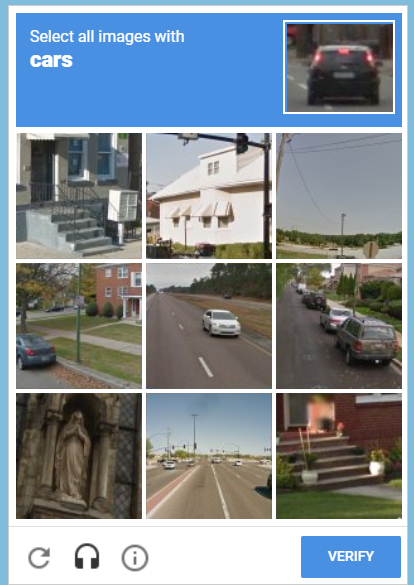
You may have to fill out a security test consisting of images for you to click. If you do, follow the instructions (Select all images with cars for example) and click VERIFY
You will then be sent a 6 digit code by SMS, it should arrive in 30 seconds or less. Enter the 6 digit code from the SMS and click CONTINUE

You are now logged in! We will keep you logged in until you log yourself out.
You should see the device dashboard.
3. The Dashboard
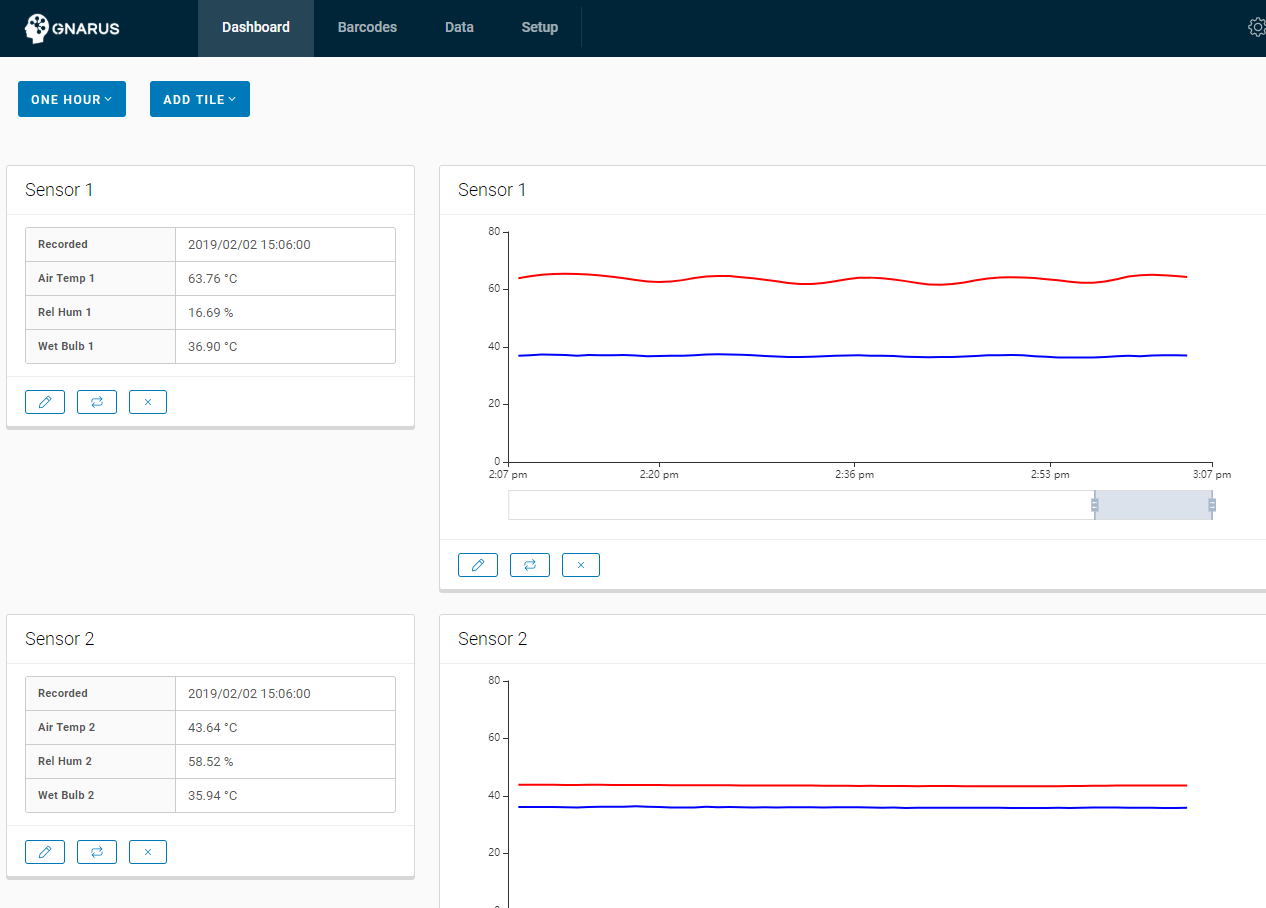
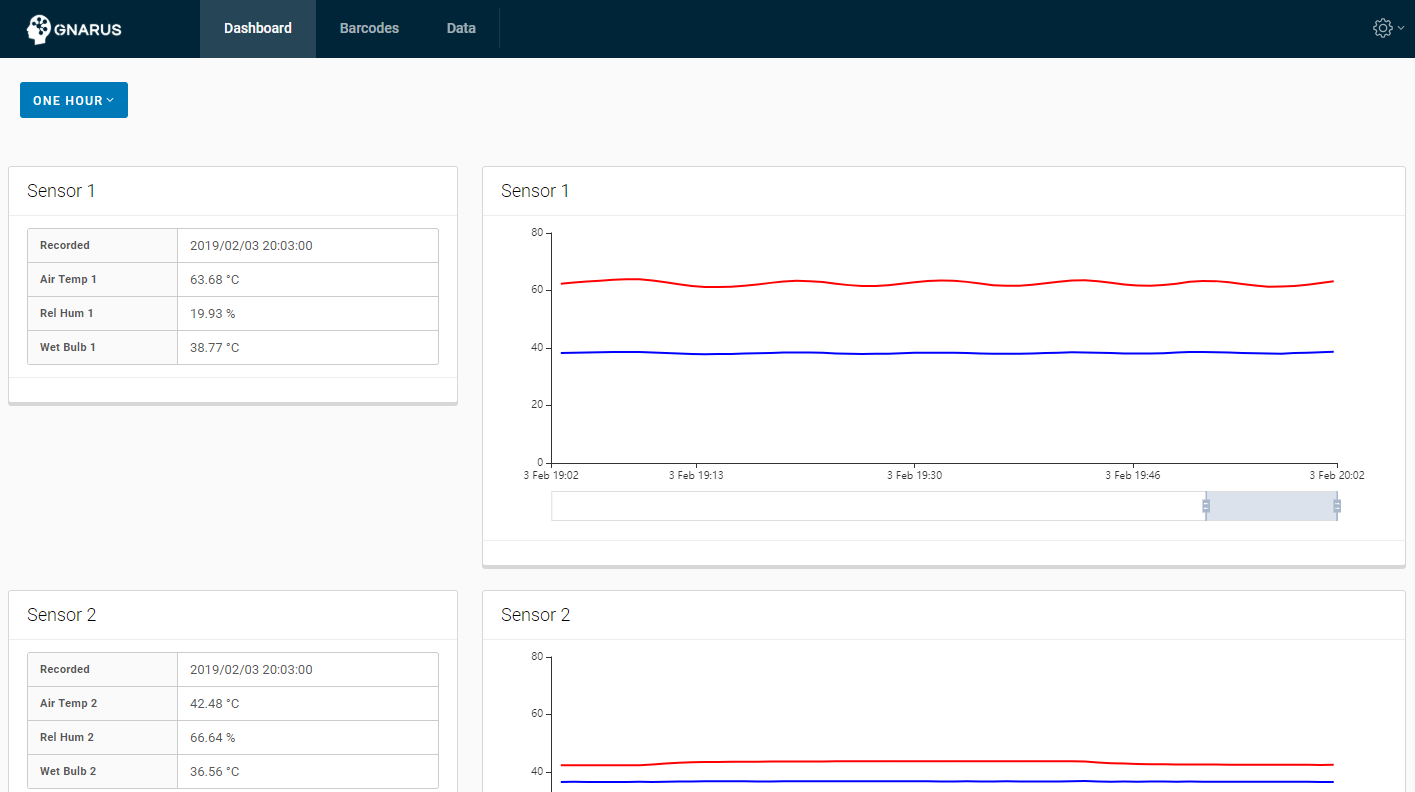
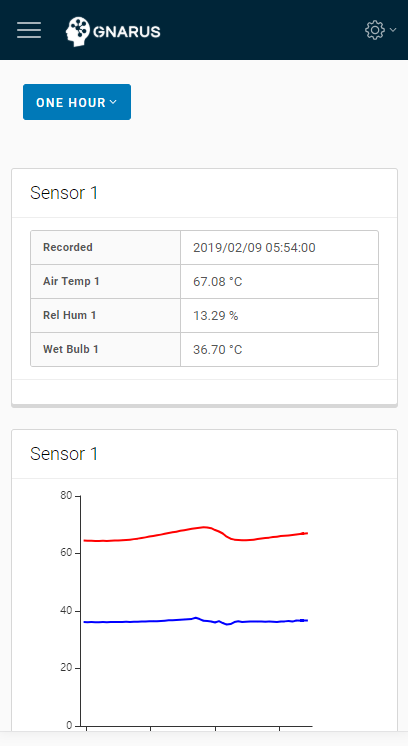
The dashboard gives you a realtime update of selected information from your operation, packaged into screen areas called tiles.
At the moment the following is available:
- The latest reading from any of your sensors
- Realtime charts of your Wet and Dry bulb temperatures
Here is what the dashboard looks like on your laptop:
And here is what it looks like on your mobile phone
4. Barcodes
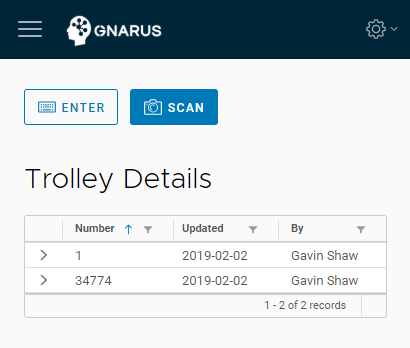
The barcodes section gives you access to all trolley and pack data captured by your curing team.
It includes:
- A table output of all raw data which can be downloaded to excel
- The ability to view details of any barcode in the table
- The ability to manually enter a barcode number to view the details of any barcode
- The ability to scan a barcode with your mobile phone to view the details of any barcode
On your laptop, the table will be large and show every field captured.
You can use the scroll bar at the bottom of the page to scroll left and right to view fields that are hidden from view.

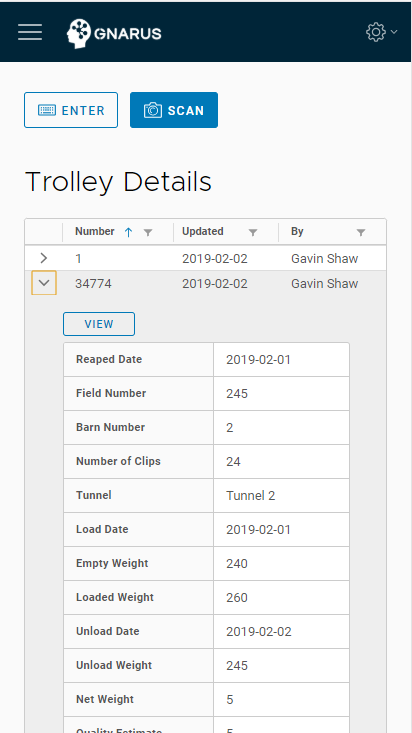
You can click the three dots next to each record and then click the View option to go to the barcode details page.

On your mobile phone, to save space, only the barcode number and updated by fields are shown.
To see more details of a barcode, click the arrow to the left of the record. You can then click the View button to go to the barcode details page.
4.1. Capturing Barcodes
There are three ways to capture a barcode to view details for it.
Click the Enter button at the top of the barcodes page, then manually enter the barcode number, you can add the leading zeros or not.
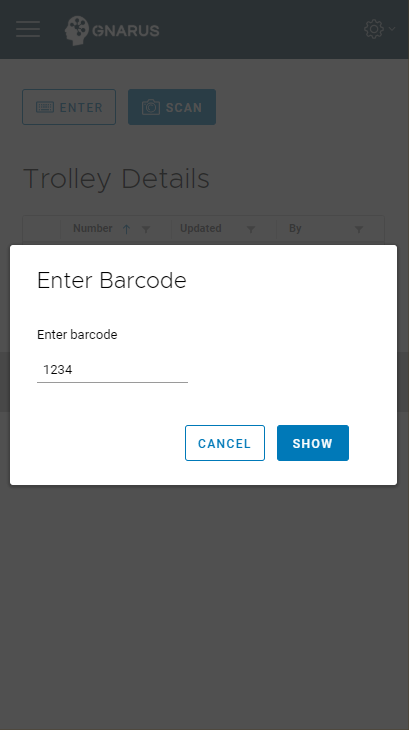
Click the Enter button at the top of the barcodes page, then scan the barcode with your external USB or Wireless barcode scanner.
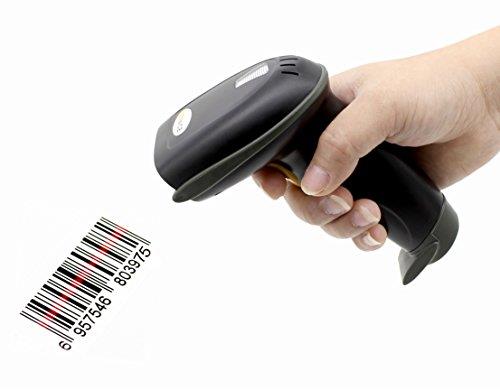
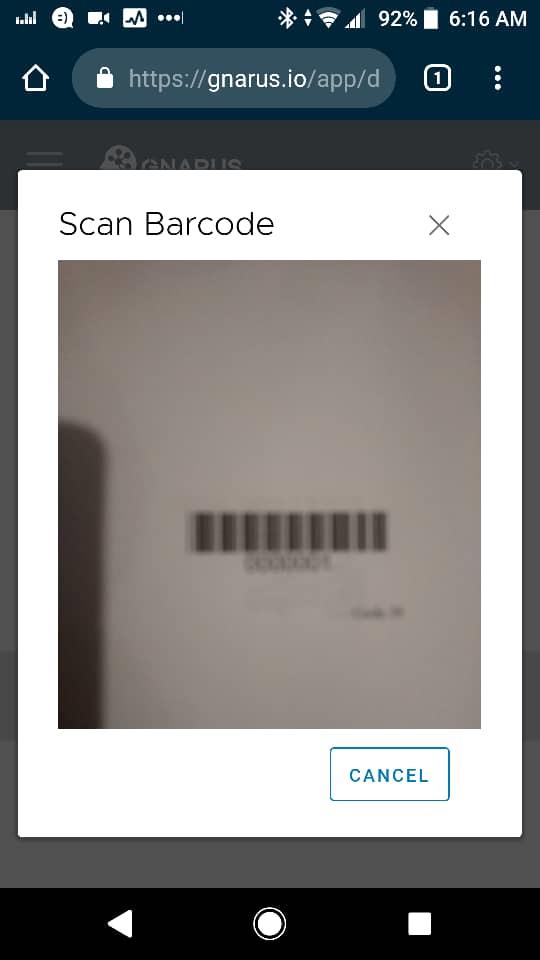
Click the Scan button at the top of the barcodes page on your mobile phone, then point your phone camera at the barcode. You may need to wait for your phone camera to focus before the barcode is captured.
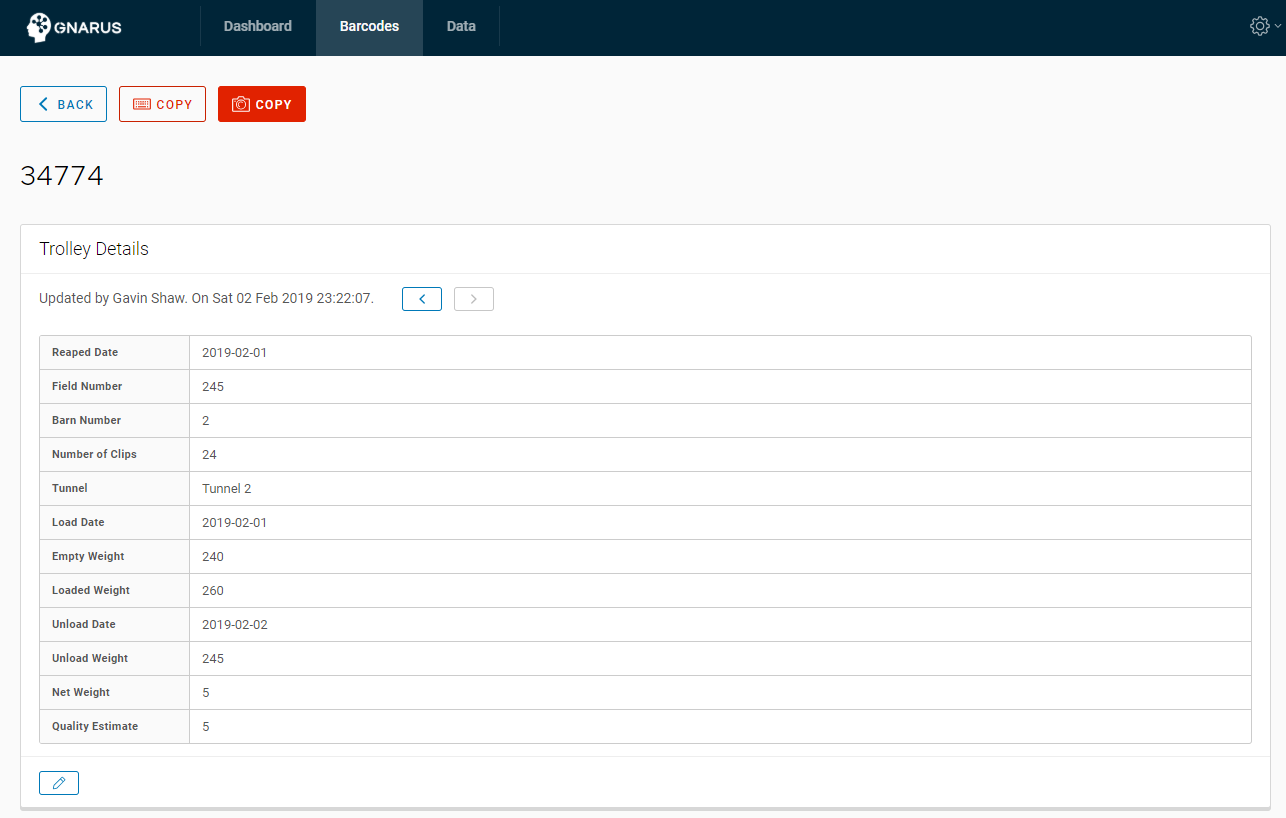
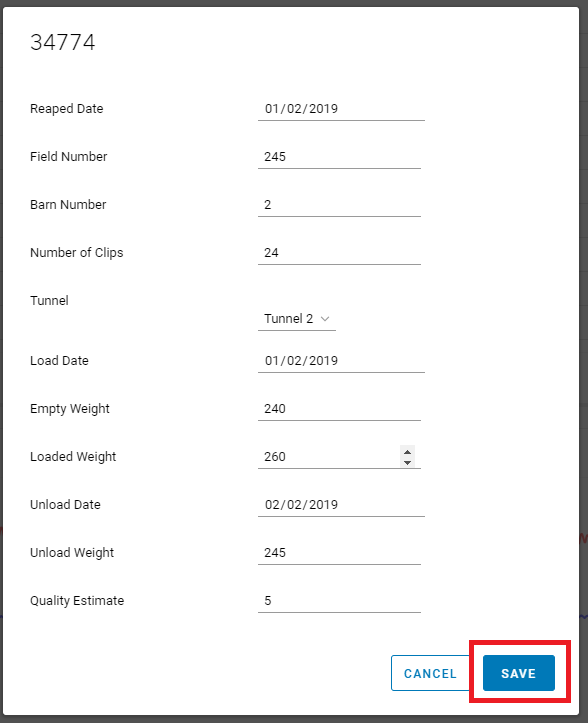
4.2. Barcode Details
The barcode details page shows you all the information captured on a barcode.
This page is shown when you:
- Click View on a barcode in the barcode list
- Manually Enter a barcode
- Scan a barcode
The fields stored on each barcode are configurable in realtime, contact us on sales@gnarus.io and we can very quickly change fields for you.
If the fields are empty, then this barcode does not have any data stored on it yet.
Click the edit icon at the bottom of the page to edit all fields.

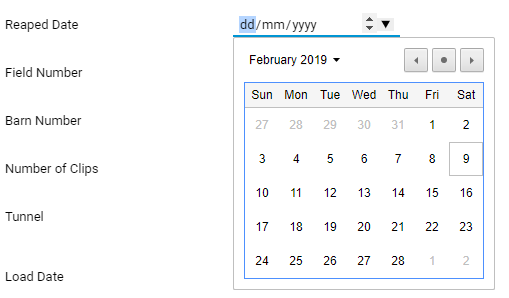
You can click the drop down next to date fields to select a date instead of having to type the date in
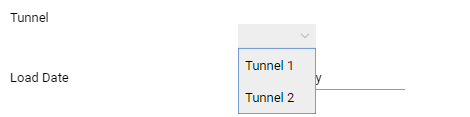
Some fields only let you select from preconfigured items, click the field to see the list of options.
Once you are happy with the data you have entered, click the Save button
Your data is now saved to the barcode. Check the top of your screen, if you are offline, then the data will only be visible to others once you go online again.
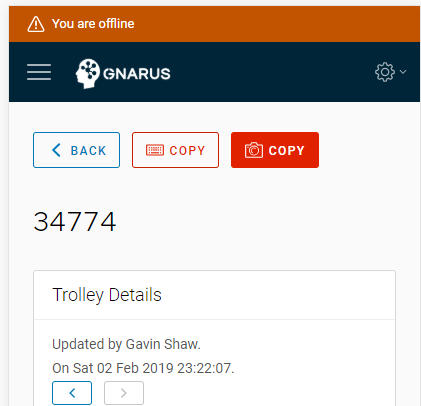
Your name and the time you made the change will be saved with the barcode and shown above the data.
Gnarus keeps the full history of all changes made to the data for each barcode, you can use the left and right arrow buttons to go back in time to see previous changes to the data and who made them.
If you made a mistake, you can go back to a previous good version of the data, then click the edit button. You will start from the previous version of the data.
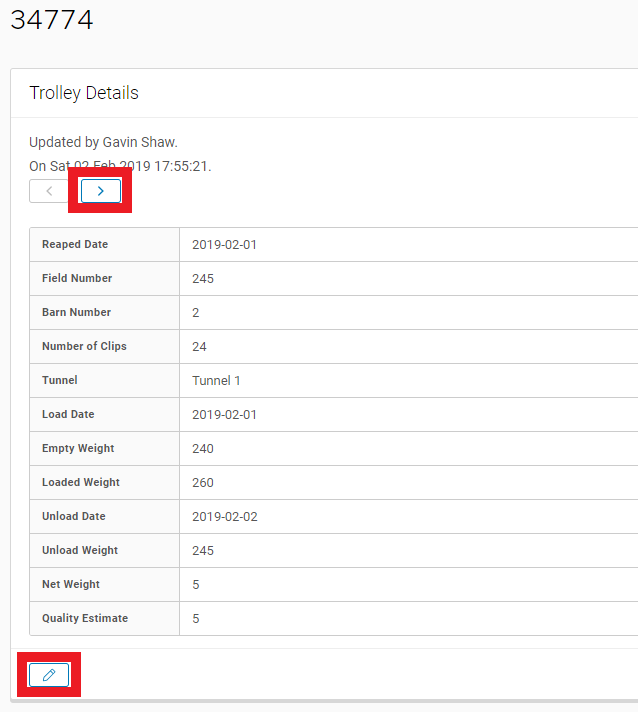
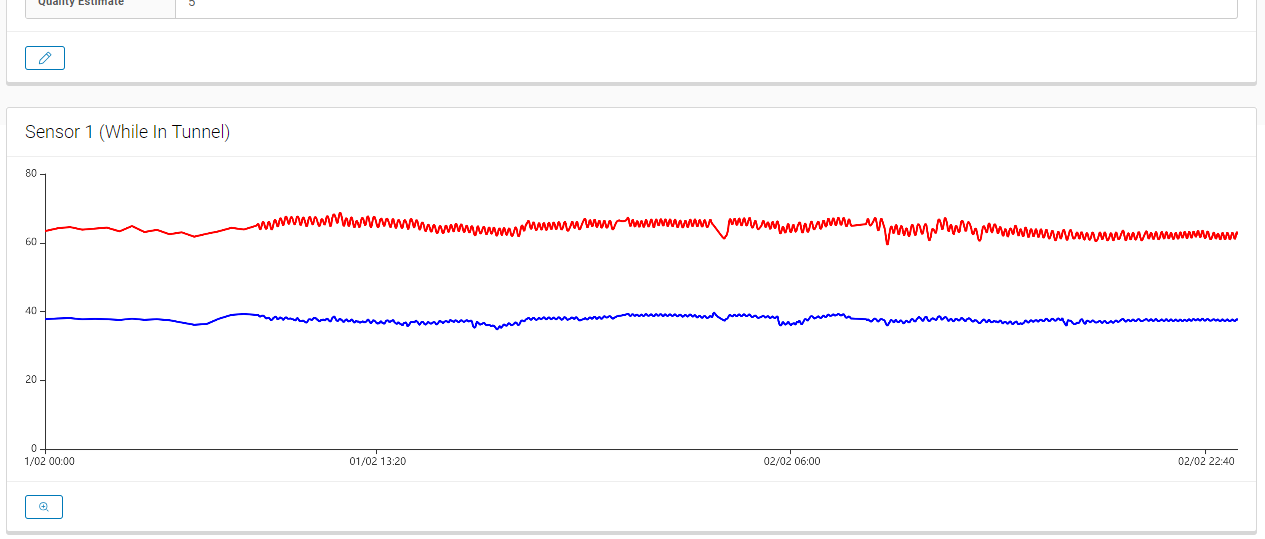
If you have entered a Load Date and Tunnel in your data, then one or more charts will be shown below the data which show the temperatures in the selected tunnel since the Load Date.
If you have also entered an Unload Date, then the chart will only show temperatures between the Load Date and Unload Date.
This chart data will be saved with the bar code permanently, so at any point in the future you will be able to view the temperature information for this barcode.
To go back to the list of barcodes, click the Back button at the top of the page.

4.3. Copying Barcode Data
Once you have unloaded your trolley from the tunnel, you will want to copy the data from the barcode to a slat pack or some other storage unit.
To do so:
- Scan the trolley barcode to bring up the data for the trolley
- Click the Red Copy button above the data (use the keyboard icon to enter a barcode, the camera icon to scan with your phone camera)
- BE SURE you have the right barcode before confirming, we will now OVERWRITE all data on the second barcode with the data from the first
- Once copied, click Back to return to the list of barcodes and repeat the process for each storage unit that has been loaded from this trolley

5. Device Setup (Admin Only)
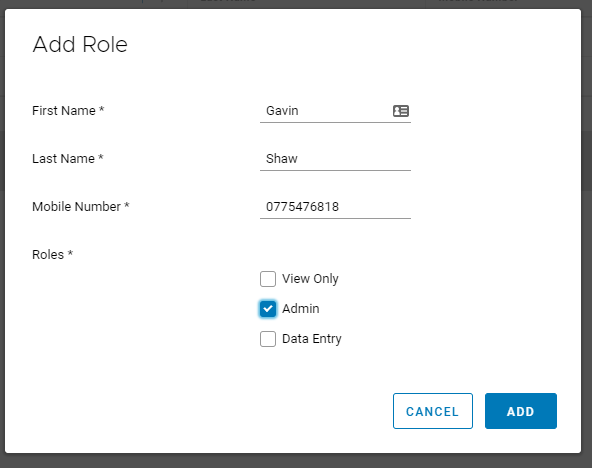
5.1. Adding Users
Follow the instructions below to give another person access to your device
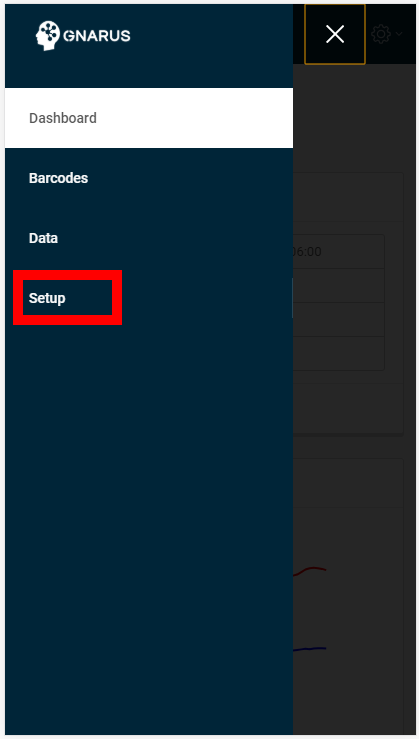
Click the Setup heading at the top of the web page

Or from the left side menu on your mobile phone
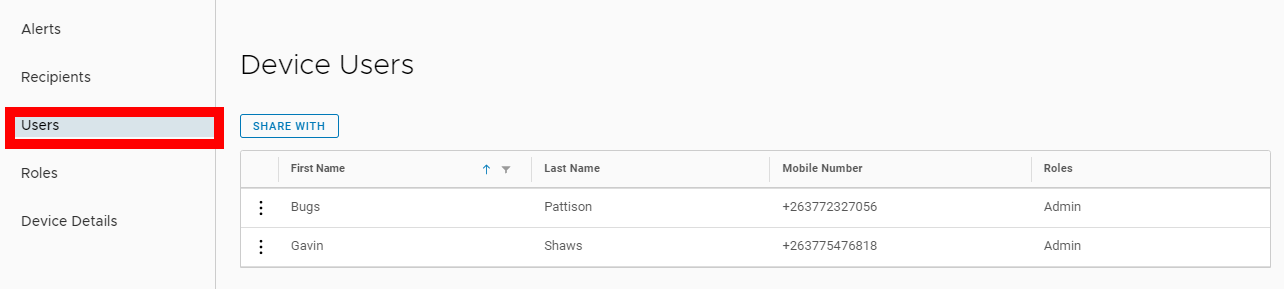
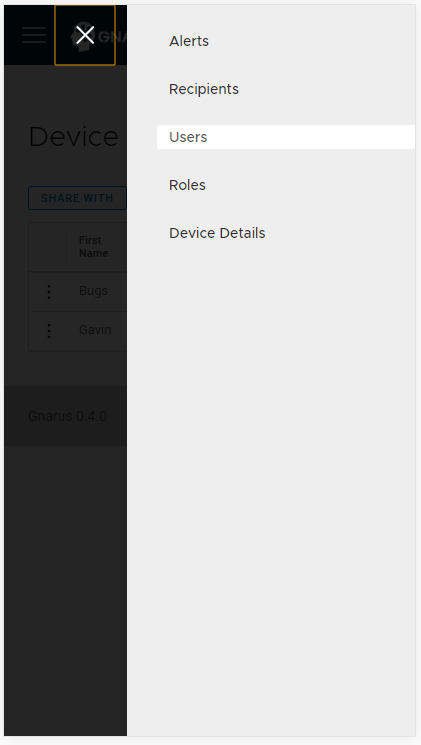
Click users on the left hand side of the page on your laptop
Or from the right side menu on your phone
Click the Share With button
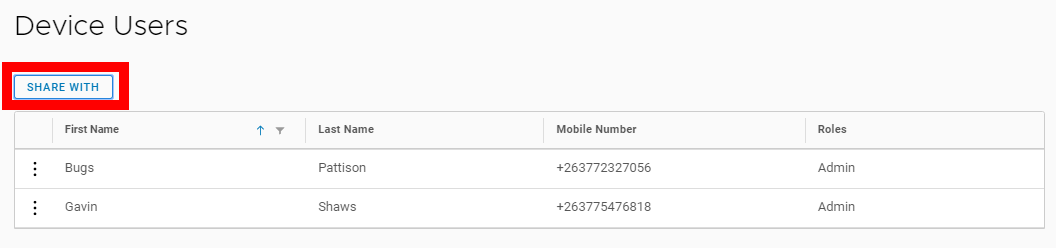
Fill in the name and mobile number of the user, and then select the level access this user can have to your device. When ready, click Save.
The current access levels available are:
- View Only: Can only view the dashboard, barcode data and download data to excel. Cannot make any changes to the system
- Data Entry: Everything in View Only, plus can edit barcode data
- Admin: Everything in Data Entry, plus can change the dashboard, edit alerts and share the device with others
The new user should now follow the instructions in the Loggin In section of this guide to get access to the system.